
API with Laravel - part 1
HEADS UP!
I’ve been a Manjaro user for quite a while and I’ll be basing this article upon that, keep in mind that PHP/Laravel setup will be different if you have another OS.
While setting up PHP/Laravel on my own, I’ve faced a few issues that weren’t well explained in Laravel docs. I’ve installed PHP and Composer using Manjaro/Arch package manager, the first step was taken using the following command:
sudo pacman -S php composerAfter pacman had installed those packages, the latest PHP and Composer versions were available in the system:
$ php -v
PHP 8.4.4 (cli) (built: Feb 11 2025 18:24:50) (NTS)
Copyright (c) The PHP Group
Zend Engine v4.4.4, Copyright (c) Zend Technologies

$ composer -V
Composer version 2.8.5 2025-01-21 15:23:40
PHP version 8.4.4 (/usr/bin/php)
Run the "diagnose" command to get more detailed diagnostics output.
Now it’s time to install Laravel and reading the installation docs I’ve seen that the recommendation was to run the following composer command:
$ composer global require laravel/installerAnd just after that, I tried to create my new Laravel application, but a few issues appeared.
Laravel command not available
After the installation, Laravel wasn’t available in the system. What happened was that composer by default defined its configurations and binaries at .config in my $HOME and that was not available to the $PATH of my system and I was expecting it to be made out of the box by the composer installation step. Not a huge problem but, it might be a hard discovery for those who are not very aware of its own system. To fix it, I needed just to inform my shell runtime configuration (rc), in my case ~/.zshrc:
# at the bottom of ~/.zshrc file include the following line:
export PATH="$HOME/.config/composer/vendor/bin:$PATH"
Also, it’s important to reload ~/.zshrc configuration using source:
$ sudo source ~/.zshrcNow, laravel is available to the system’s $PATH and we’re able to create our first Laravel App with the following command (as recommended by Laravel docs):
$ laravel new example-appThis command will ask some questions and for our first app, we should always answer with the default responses (that are always the first option).
SQLite & Artisan
The next step of the Laravel docs is to fire up the application and again, another issue happened. Laravel relies on SQLite since version 11, so by default it expects that the system has the PHP SQLite module installed and enabled into the php.ini configuration file, which wasn’t my case. Let’s fix this issue, first we should install php sqlite module with:
$sudo pacman -S php-sqliteIt’s important to enable this module globally into our php configuration file. Since you have installed PHP into the system, it already provide a global php.ini file and to check it’s location, you can run the following command:
$ php --ini
Configuration File (php.ini) Path: /etc/php
Loaded Configuration File:         /etc/php/php.ini
Scan for additional .ini files in: /etc/php/conf.d
Additional .ini files parsed:      (none)
The Loaded Configuration File is located at /etc/php/php.ini, we should uncomment the following lines (that you may find inside php.ini file):
# on your loaded php.ini file uncomment the following lines

# from:
;extension=pdo_sqlite
;extension=sqlite3

# to:
extension=pdo_sqlite
extension=sqlite3
Afterwards you can check if these modules will be finally loaded globally, to do so you can run the following command:
$ php -m | grep sqlite
pdo_sqlite
sqlite3
Now that we have the SQLite module available for our PHP environment we need to perform a final step before we can finally start the development of our first application, we should run the app’s migration which means that, since we’ve opted to use Laravel authentication (default response that we answered at the creation of the new app), Laravel created a User model at ./app/Models/User.php. This file/model defines a SQLite table that should be created before we start to use our application (and for further authentication functionality work). To do so, we should run the artisan migration:
$ php artisan migrateWhat is Artisan?
Artisan is the command-line interface for Laravel. It provides a set of built-in commands to automate tasks like database migrations, seeding, queue management, and code generation.
It’s time to fire up our application and check it running at http://localhost:8000:
$ composer run dev
> Composer\Config::disableProcessTimeout
> npx concurrently -c "#93c5fd,#c4b5fd,#fb7185,#fdba74" "php artisan serve" "php artisan queue:listen --tries=1" "php artisan pail --timeout=0" "npm run dev" --names=server,queue,logs,vite
[queue]
[queue]    INFO  Processing jobs from the [default] queue.
[queue]
[logs]
[logs]    INFO  Tailing application logs.                        Press Ctrl+C to exit
[logs]                                                Use -v|-vv to show more details
[vite]
[vite] > dev
[vite] > vite
[vite]
[vite]
[vite]   VITE v6.2.0  ready in 398 ms
[vite]
[vite]   ➜  Local:   http://localhost:5173/
[vite]   ➜  Network: use --host to expose
[server]
[server]    INFO  Server running on [http://127.0.0.1:8000].
[server]
[server]   Press Ctrl+C to stop the server
[server]
[vite]
[vite]   LARAVEL v12.1.1  plugin v1.2.0
[vite]
[vite]   ➜  APP_URL: http://localhost
[server]   2025-03-09 14:28:56 / ............................................ ~ 0.10ms
This composer command will start both PHP and NodeJS commands, since the front-end is relying on react which is the default answer at the new app creation of Laravel. This is the recommended way to start the application, described in Laravel docs.
API ‘/api/hello’ route
The starting point of any API rest is the creation of the first route. When I start to develop any rest API my first task is always to create the health check route, which is a simple GET route that responds to a JSON containing a message ‘ok’ or ‘hello world!’. This is also a great way to understand how a request works at the project structure.
api.php file
Laravel provide some default routes for a fullstack application and it does provide a health check route at ‘/up’ endpoint. There is also an artisan command to list the available routes of our application, which is:
$ php artisan route:list

 GET|HEAD  / ....................................................... home
 GET|HEAD  confirm-password password.confirm › Auth\ConfirmablePasswordC…
 POST      confirm-password .... Auth\ConfirmablePasswordController@store
 GET|HEAD  dashboard .......................................... dashboard
 POST      email/verification-notification verification.send › Auth\Emai…
 GET|HEAD  forgot-password password.request › Auth\PasswordResetLinkCont…
 POST      forgot-password password.email › Auth\PasswordResetLinkContro…
 GET|HEAD  login ..... login › Auth\AuthenticatedSessionController@create
 POST      login .............. Auth\AuthenticatedSessionController@store
 POST      logout .. logout › Auth\AuthenticatedSessionController@destroy
 GET|HEAD  register ..... register › Auth\RegisteredUserController@create
 POST      register ................. Auth\RegisteredUserController@store
 POST      reset-password password.store › Auth\NewPasswordController@st…
 GET|HEAD  reset-password/{token} password.reset › Auth\NewPasswordContr…
 ANY       settings ............. Illuminate\Routing › RedirectController
 GET|HEAD  settings/appearance ............................... appearance
 GET|HEAD  settings/password password.edit › Settings\PasswordController…
 PUT       settings/password password.update › Settings\PasswordControll…
 GET|HEAD  settings/profile profile.edit › Settings\ProfileController@ed…
 PATCH     settings/profile profile.update › Settings\ProfileController@…
 DELETE    settings/profile profile.destroy › Settings\ProfileController…
 GET|HEAD  storage/{path} ................................. storage.local
 GET|HEAD  up ...........................................................
 GET|HEAD  verify-email verification.notice › Auth\EmailVerificationProm…
 GET|HEAD  verify-email/{id}/{hash} verification.verify › Auth\VerifyEma…

                                                      Showing [25] routes
These are default routes already defined by Laravel, counting on authentication logics out of the box. But it is desirable that our api has a custom routes file. Let’s create our custom route file called api.php:
$ touch ./routes/api.phpNow let’s create our endpoint functionality, add the following to the file:
<?php
use Illuminate\Support\Facades\Route;
Route::get('/hello', function () {
return response()->json(['message' => 'Hello World!']);
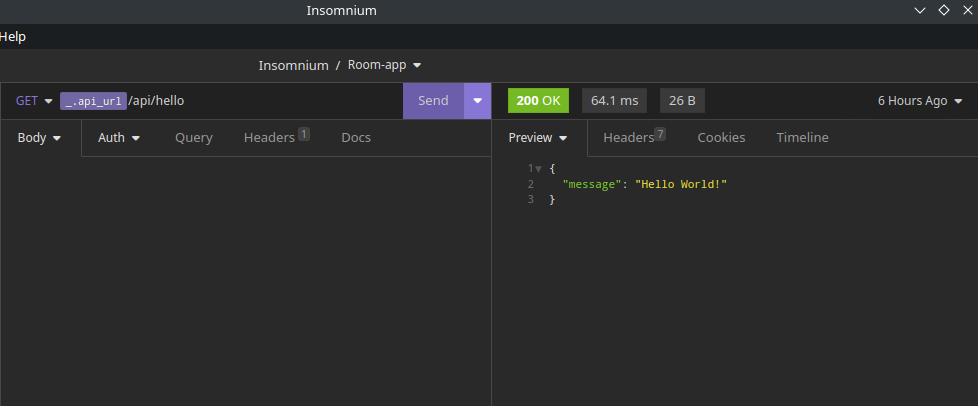
});We have defined a new GET route, that responds to /hello endpoint and returns a JSON object that has a message attribute containing a string 'Hello World!'. Now we have to inform Laravel that we have a custom routes file, to do so we must edit the bootstrap/app.php file and inform that our custom routes will respond a prefix called 'api' in order for our endpoint be '/api/hello':
<?php
use Illuminate\Foundation\Application;
use Illuminate\Foundation\Configuration\Exceptions;
use Illuminate\Foundation\Configuration\Middleware;

return Application::configure(basePath: dirname(__DIR__))
	->withRouting(
		web: __DIR__.'/../routes/web.php',
		commands: __DIR__.'/../routes/console.php',
		health: '/up',
		api: __DIR__.'/../routes/api.php',
)
We have defined our first custom route! You should test it now! I’ll be using Insomnium:
And that was our first ride into Laravel 12! This article is meant for those unaware of the history of Laravel evolution, and there are a lot of questions to be made and the most important thing to understand is that, prior to 11 version, Laravel provided a api.php route file. Of course we defined a custom route file manually, but it is also possible to recreate this file using artisan:
$ php artisan install:apiThis command will add the api.php route and also configure token logics for users. Laravel is fast because it already provides some logics out of the box for us, so in the next articles of Laravel we’ll dive even further on our small API rest.